I looked at quite a few platforms to host my new course. Tackk is very simple and quick to use, but I soon hit the limits when I put my Scratch course together. Udemy and other online offerings are very much video focused and although I wanted to include video I didn't want it to be the main teaching medium.
So I opted for Versal.
Firstly let me stress Versal isn't really designed with coding courses in mind. It's a general purpose online teaching tool, but it has the flexibility built in to enable me to create the materials that I wanted. However there are some features that make Versal a great choice for this kind of course.
Firstly, you have all the standard tools that you expect to see in an editor such as the ability to insert videos, a good range of interactive quizzes and integration with Google Drive.
The most useful built into Versal is the Markdown editor, which conveniently has a Code option. This is wonderful for including little snippets of code. However it doesn't handle indentation too well, which is important for Python.
However to include longer pieces of code I turned to Pastebin.com this enabled me to include code quickly and also in a format that students could easily copy and paste materials without annoyances such as numbers and indentation problems. There are some limitations, in an embedded window you can only get about 30 lines of code. If you want to share a longer code sample, you are better off including a link.
Finally I included the code on GitHub. Useful enough to have a quick to download zip file, but I feel it's good for students to start using the industry standard tools as soon as possible: https://github.com/jamesabela/PyGameCourse
Wednesday, 30 December 2015
Sunday, 20 December 2015
Christmas Gift for everyone: Python & Pygame Course
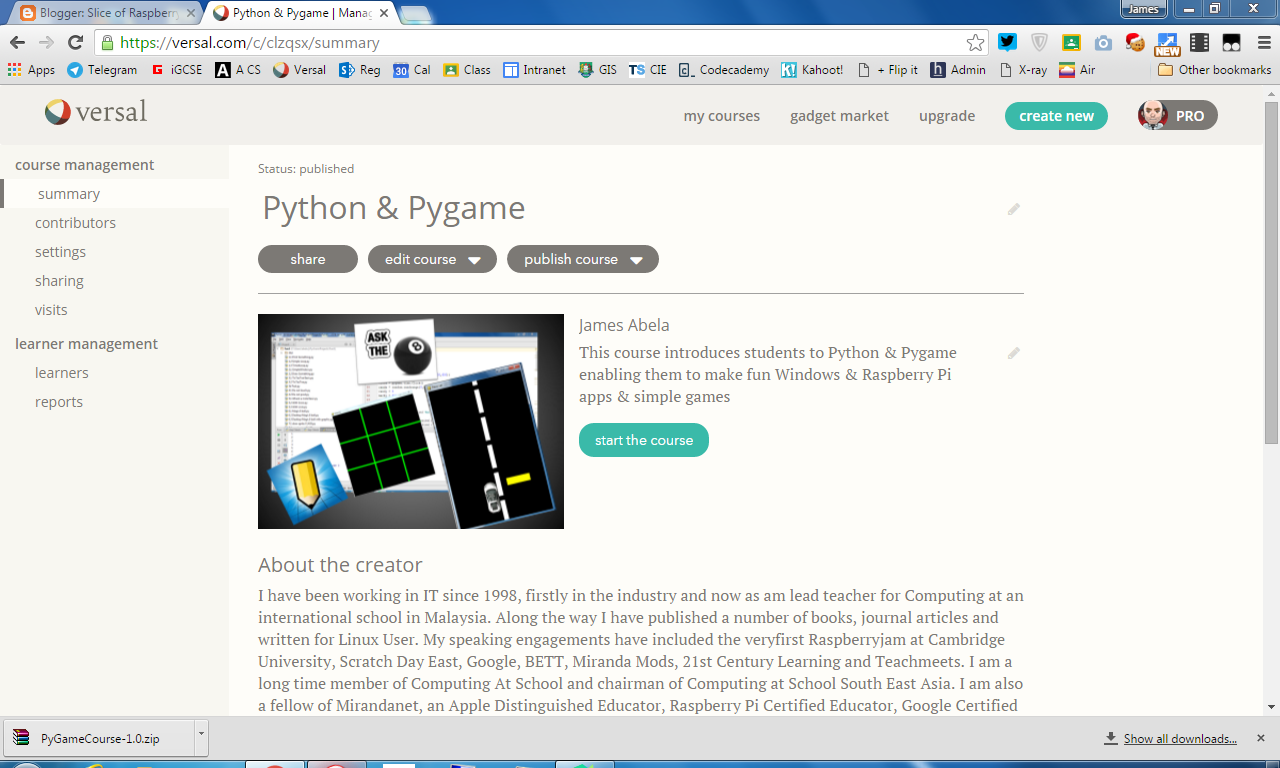
For the past week I've been making my way around Versal and after quite a lot of work. I've managed to publish my first course. Please take a look it's at: https://versal.com/c/clzqsx/python-pygame It has been an experience to see just how expert many tutorials are. Most appear to be aimed at the truly dedicated! I can't imagine many children wanting to put in more than 100 lines before they even get their first game!
One aspect of the coding process that has been very helpful is Pycharm, it's debugging is far superior to the default client and I'd highly recommend getting it installed. The EDU edition seems to have a great feature set and taken away some of the more complex features.
Feel free to have a go and please let me know what you think! The code has all been tested in Python 3 & Pygame.
Wednesday, 11 November 2015
Quiz Tools - The Ultimate Showdown
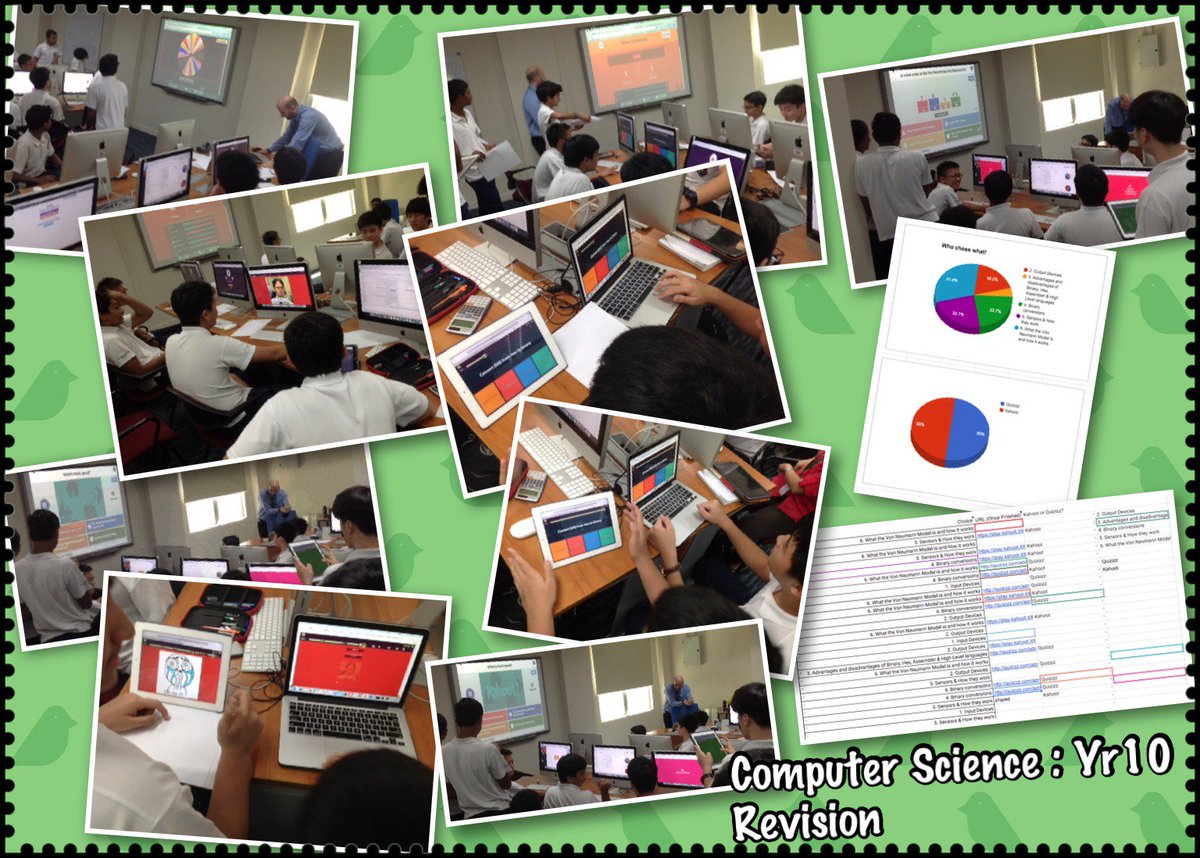
This week was a revision week before my year 10's next big assessment. So I decided to run a little competition. The students could choose any quiz app they pleased and then the following lesson we'd play the quizzes.
Round 1
Quizlet was knocked out the competition straight away, because none of the year 10s wanted to develop quizzes for that platform and neither did any students choose Socrative. So they didn't make it to the final!
Round 2
The two finalists were Quizizz and Kahoot Students enjoyed creating questions for both platforms and the process was pretty similar.
The Grand Finale
I used a Single Google Sheet to coordinate the quizzes. Each student gave me an url to direct the quiz. I then used a random name picker to choose the quizzes.Let Battle Commence!
Both platforms feel like a quiz show with countdowns and music.
Class Game Vs individual
The first key difference is that in Quizizz students play through all the questions when they choose to start the game. This enables students to do the exercise when they have finished another task or it can even be set for homework. Whilst on Quizizz they were highly focussed on their screens but they were not so directly competing with each other.
In Kahoot the whole class plays together, which adds to the sense of community but means everybody has to play the same quiz at exactly the same time!
Question displayed on Main Screen Vs at Your device
Quizizz also displays the questions on the students device, so not everybody has to see the projector, which is a real advantage in rooms with poor visibility.
Logins
We had no difficulties at any point logging into Kahoot and this weekend I had over 80 players at once playing it. With Quizizz we did have one or two small login problems, but all were fixed with the judicious use of the refresh button.
Who won?

The students narrowly gave the win to Kahoot! They acknowledged the fact that Quizizz enables quizzes to be given out as homework and they enjoyed using both. So it was a noble contender that we hope goes from strength to strength!
Tuesday, 3 November 2015
Cameron must be following my lesson plans!
I'm In year 7IT we are teaching our students the ethics of using Photoshop. Firstly by showing them the tools and then asking the bigger question as to what is an ethical use of Photoshop?
Is Mr Cameron reading my lesson plans?
A good example of somebody who is manipulated on a regular basis is David Cameron. Some parts of the media support him and naturally enough choose complimentary photos. Others are not so happy with his performance and are quick to show him red-faced. The lesson was a great success and the students soon turned to making themselves into heroes and villains. Being Halloween, it was doubly fun!
Now my next lesson is to mix a foreground and background image. So imagine my surprise this morning when I see this.
So the only question left is, has Mr Cameron's team crossed an ethical line with this? Please comment we'd love to hear from you!
Friday, 23 October 2015
Setting up a great Python Coding Environment
Due to haze days we've had a bit of time to sort out a very nagging issue for me. Ensuring my students have a great coding experience! Easy enough if you are using a Raspberry Pi, which is setup very nicely to code out of the box with a new OS and tools an SD Card away, but for real computers this can be a pain in the neck!
My first requirement was a version of Python that works well with Pygame and something we can replicate across a number of PCs. We use Macs, so after much playing around we figured that Bootcamp was our best option to deliver Python 3.4.3 with Pygame. (At the moment I can't find a 3.5.0 version) We tried numerous times to get it working natively on Mac and failed miserably. Best I could do was get version 2.7.1, but then we discovered it relies on quite a lot of emulation anyway, so seemed like a waste of time. (Please put comments in, if you have had more success than me.)
Linux is actually easy enough to install, but Windows is already installed and the students are largely familiar with it.
DO NOT TRY WITHOUT PARENTAL / EMPLOYER PERMISSION.
So after looking around most of the net, we found an excellent site: http://programarcadegames.com/ So here are the instructions:
Next we found an excellent editor called Pycharm Edu, which has a number of extra teaching features which I hope to start using in the near future: https://www.jetbrains.com/pycharm-edu/ Just download and follow the instructions.
One point to note, when you make a new project you have to choose interpreter 3.4.3. Pycharm automatically adds 3.5.0.
My first requirement was a version of Python that works well with Pygame and something we can replicate across a number of PCs. We use Macs, so after much playing around we figured that Bootcamp was our best option to deliver Python 3.4.3 with Pygame. (At the moment I can't find a 3.5.0 version) We tried numerous times to get it working natively on Mac and failed miserably. Best I could do was get version 2.7.1, but then we discovered it relies on quite a lot of emulation anyway, so seemed like a waste of time. (Please put comments in, if you have had more success than me.)
Linux is actually easy enough to install, but Windows is already installed and the students are largely familiar with it.
The Method
PLEASE ONLY DO THIS IF YOU ARE A CONFIDENT COMPUTER ADMINISTRATOR.DO NOT TRY WITHOUT PARENTAL / EMPLOYER PERMISSION.
So after looking around most of the net, we found an excellent site: http://programarcadegames.com/ So here are the instructions:
- Remove all previous versions of Python on your PC. (We had quite a few)
- Run the Python installer downloaded from:
ProgramArcadeGames.com/python-3.4.3.msi - Run the Pygame installer downloaded from:
ProgramArcadeGames.com/pygame-1.9.2a0.win32-py3.4.msi
One point to note, when you make a new project you have to choose interpreter 3.4.3. Pycharm automatically adds 3.5.0.
Tuesday, 14 July 2015
Minecraft Mega Structures
My Little Minecraft Pi project!
This is my Raspberry Pi project. It's great to use Minecraft to create buildings, but the power of doing it programmatically is that you can create whole streets and towns. This basic Python code will produce a street of skyscrapers.
There's a lot of potential here and I am sure it would make the basis for some great lessons. What's great fun is as soon as you show people the idea people run with it & think of all sorts of refinements.
Here's the Python code, I hope it all makes sense.
# Setup Minecraft library
from mcpi import minecraft
mc = minecraft.Minecraft.create()
#Get player position
x, y, z = mc.player.getPos()
#Terraforming - Create air
mc.setBlocks(x-30, y, z-30, x+500, y+39, z+40, 0)
#Make a grassy area
mc.setBlocks(x-30, y-1, z-30, x+500, y-2, z+40, 2)
#Loop to create 6 buildings
for builder in range (0,5):
# Create stone block
mc.setBlocks(x+1, y-1, z+1, x+11, y+40, z+11, 1)
# Make it hollow
mc.setBlocks(x+2, y, z+2, x+10, y+39, z+10, 0)
#Create a series of windows
for glwin in range (0,4):
mc.setBlocks(x+2, y+(glwin*10), z+1, x+2, y+(glwin*10+3), z+1, 20)
mc.setBlocks(x+6, y+(glwin*10), z+1, x+6, y+(glwin*10+3), z+1, 20)
mc.setBlocks(x+8, y+(glwin*10), z+1, x+8, y+(glwin*10+3), z+1, 20)
mc.setBlocks(x+2, y+(glwin*10), z+11, x+3, y+(glwin*10+3), z+11, 20)
mc.setBlocks(x+6, y+(glwin*10), z+11, x+7, y+(glwin*10+3), z+11, 20)
mc.setBlocks(x+8, y+(glwin*10), z+11, x+9, y+(glwin*10+3), z+11, 20)
#Create door to see inside
mc.setBlock(x+2, y, z+1, 71)
mc.setBlock(x+2, y+1, z+1, 71)
x+=25
# Setup Minecraft library
from mcpi import minecraft
mc = minecraft.Minecraft.create()
#Get player position
x, y, z = mc.player.getPos()
#Terraforming - Create air
mc.setBlocks(x-30, y, z-30, x+500, y+39, z+40, 0)
#Make a grassy area
mc.setBlocks(x-30, y-1, z-30, x+500, y-2, z+40, 2)
#Loop to create 6 buildings
for builder in range (0,5):
# Create stone block
mc.setBlocks(x+1, y-1, z+1, x+11, y+40, z+11, 1)
# Make it hollow
mc.setBlocks(x+2, y, z+2, x+10, y+39, z+10, 0)
#Create a series of windows
for glwin in range (0,4):
mc.setBlocks(x+2, y+(glwin*10), z+1, x+2, y+(glwin*10+3), z+1, 20)
mc.setBlocks(x+6, y+(glwin*10), z+1, x+6, y+(glwin*10+3), z+1, 20)
mc.setBlocks(x+8, y+(glwin*10), z+1, x+8, y+(glwin*10+3), z+1, 20)
mc.setBlocks(x+2, y+(glwin*10), z+11, x+3, y+(glwin*10+3), z+11, 20)
mc.setBlocks(x+6, y+(glwin*10), z+11, x+7, y+(glwin*10+3), z+11, 20)
mc.setBlocks(x+8, y+(glwin*10), z+11, x+9, y+(glwin*10+3), z+11, 20)
#Create door to see inside
mc.setBlock(x+2, y, z+1, 71)
mc.setBlock(x+2, y+1, z+1, 71)
x+=25
Tuesday, 30 June 2015
Getting Ready for The New Academic year!
Sometimes towards the end of the summer term you will find a little time to start prepping for the new academic year! Well there's two technologies that I think are well worth looking over. Both are free, completely different from one another, but could do the same job!
You've got an iPad
iTunesU is incredibly well integrated into the iPad and in a 1:1 environment it is almost a complete replacement for text books if you have the notes and materials. One of the major improvements I have noticed is that you can now use almost any modern browser to add materials from PC or Mac and you can also use an iPad to add materials. Google Classroom also has an iPad app, so you can choose to use either on an iPad. See More here>>Google Classroom
This has been in very rapid development over the past year and has quickly flourished into a product, that is really going to save you time next academic year. If your school already has a well setup Google Apps domain, then you will quickly be able to use to mark up work across a range of devices. It's much more cross-platform and is really a great way to collect in work from Google Docs. See More Here>>
Subscribe to:
Posts (Atom)